Even You Can Prepare This Turkey Dinner
Many, many years ago, when I was a freshman in college (there were dinosaurs roaming, but they aren’t part of this story), I entered a “Turkey Shoot” at the ROTC building. My friends were skeptical, as they couldn’t quite picture me with a rifle, but I actually did have some experience shooting a .22 at the rifle range with my dad and brother.

I was disappointed when I got to the ROTC building. The target was a 6″ x 7″ piece of white paper, slung w-a-y down there at the end of the firing lane. It had a grid printed on it with a number in each square, but even with my 20-20 eyesight, the numbers were invisible. Actually, the grid itself wasn’t very apparent, either. The idea was to shoot at the highest numbers to get the highest total score. I hit the paper with every shot, but the score was left up to luck.
Still, I won! I actually won!
A soldier-in-training handed me my certificate to grab the turkey of my choice from a Safeway supermarket. Thanksgiving break was only a few days away and I had no idea how to prepare a turkey, nor did any of my three roommates. This, coupled with the fact that none of us even had a car we could use to drive to the store (which was nowhere near campus), made the situation seem all but dismal.
Luckily I roped a boyfriend into taking me. I picked up the tiniest turkey available and turned to go check out. No!, my boyfriend exclaimed. When one wins a free turkey, one chooses the largest. I had never before seen a 32-pound turkey, but he managed to find one.
It took all four of us roommates to hoist it into the kitchen sink and get it stuffed, a process that was followed by an extensive scavenger hunt to find a big enough pan. Once cooked, we ended up putting it outside on a table so everyone in the residence hall could take some. It barely exhausted itself before we all headed home on vacation.
Fast-forward decades. The dinosaurs are extinct, except in the movies and toy sections of big box stores. I’m now a very experienced turkey maker (never again have I attempted another 32 pounder, however), and I want to tell you all the easiest shortcuts.
Timing is Everything—Timing the Defrost

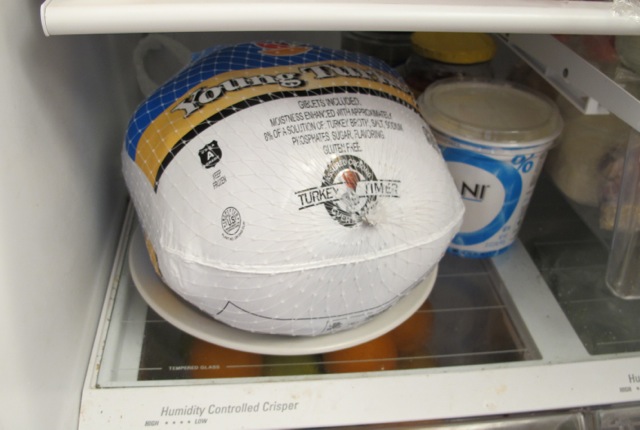
There are a few very scary things about preparing your first turkey, but timing is probably what will make you the most insecure. The first thing you will have to figure out is how to defrost a frozen turkey. Fresh turkeys are available, but frozen turkeys are more plentiful.
Just so you know, there are both hens and toms (males) out there in the grocery store. This might be instinctive, but the hens are smaller with more breast meat, and the toms are larger with less. It won’t make any difference for timing problems, but I just thought you should know.
Usually, to defrost a turkey, you put in in the fridge for 781 days (at least it feels that long). Once the meat begins to give when you push on it, and then once the meat you can feel feels defrosted, the inside will still be icy but will relent when you run tepid water over it.
Someone is going to yell at me for this, but I have actually defrosted a turkey outside the fridge. Grocery store paper bags are incredible insulators. I have wrapped a frozen turkey (still in its wrappings) inside 2 or 3 of those paper bags and placed it on top of the fridge overnight. This worked (except that one year when our cat found it). The frozen inside of the turkey kept the outside cool. I’m not going to recommend this. Think of it as a confession.
Yes, defrosting a turkey inside the fridge takes days, but in a cooler it should defrost overnight. For defrosting in a cooler, leave the turkey in its wrappings. Fill the cooler with enough cool water to cover the meat, put in the turkey, and close the lid. Now you can leave your turkey in the cooler to thaw. The water in the cooler will remain icy cold for quite a while depending on the quality of your cooler and the temperature of the room the cooler in left in.
Here’s what the experts from Butterball.com say:
Easiest Stuffing
The easiest stuffing is also the most traditional-tasting. Of course, there are hundreds of variations on the stuffing theme, and you can get inventive once you get the basics.
Buy enough packaged stuffing for the size of the turkey you are preparing. Tom turkeys have larger rib cavities than hens. Get herbed stuffing, not simply breadcrumbs that you have to season yourself. You will want to add chopped yellow onion, chopped celery, and walnut pieces, if you desire. Follow the directions on the package, but go for chicken broth instead of water, and REAL butter.
Dressing the Turkey

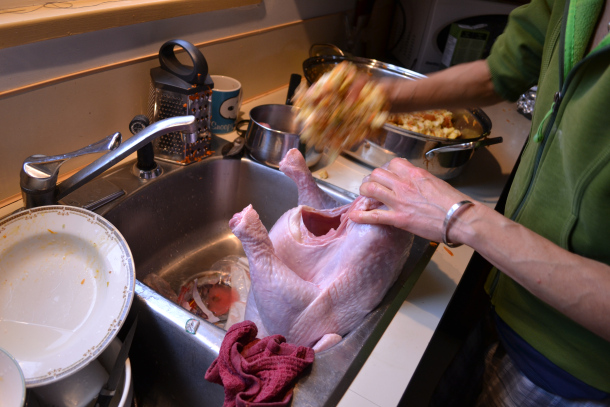
Clean your kitchen sink thoroughly with dish soap and rinse well. Place the turkey in the sink and unwrap. The legs will probably be braced under a plastic contraption. If the legs are kind of frozen, they won’t move. Run warm water over them, or float the turkey in cool water for a time, until you can manage to disengage them. If the neck, gizzard, and liver (wrapped in paper) are frozen in place inside the rib cavity, run warm water on them until they can be removed.
Simmer the neck, gizzard, and liver in a medium pot of water on the stove for 45 minutes, then use the broth for gravy.
Make sure the turkey is rinsed and clean. Put some salt in your hand and rub it onto the walls of the rib cavity and on the other end of the turkey where there is a flap of skin, rub salt inside that cavity.
With a large spoon, spoon prepared stuffing into the rib cavity. They say to do this loosely, but I’ve always used a bit of force to get more in and have never suffered for making this choice. Manipulate the legs back into the plastic leg-holders, then cover the stuffing peeking out between them with a square of aluminum foil. Turn the turkey over and around to stuff the other end.
Yeah, this side I stuff beyond the recommended “loosely.” Stuffing tastes so much better when it’s cooked inside a bird, and this is your last chance. If you really push the stuffing in, the skin will split during roasting, but the sun will still rise tomorrow. Use your big spoon to drop in stuffing, then fold the skin flap over and fasten it in place.
This is when you’ll wish you had purchased that turkey preparation kit with the sharp thingies and laces. But never fear. Multiple tries with very strong toothpicks usually works, and I’ve even cleaned long building nails very, very well and used those. I still have friends (because they don’t know about this).
You can save the rest of the unused stuffing and bake it later in the oven. (It doesn’t taste near as good as the stuffing in the bird. Experts, please add your suggestions!)
Timing is Everything—Roasting the Turkey Faster than you Thought Possible

Really, I think we can all agree that timing your turkey roasting is an exercise in anxiety. Depending on your family traditions, dinner could be at noon, 2:00, or 5:00 p.m. And you will need hours to roast your turkey to perfection. This cooking method is the fastest, and presents a moist, yummy turkey.
Choose a large pan with sides. Not glass. Use a 9″ x 13″ metal cake pan, or a turkey-roasting pan, or some such.
Lay VERY LONG pieces of aluminum foil (2.5 times the width or length of the turkey) into this pan in both directions. You can use heavy-duty foil, but it doesn’t seem to make much difference.
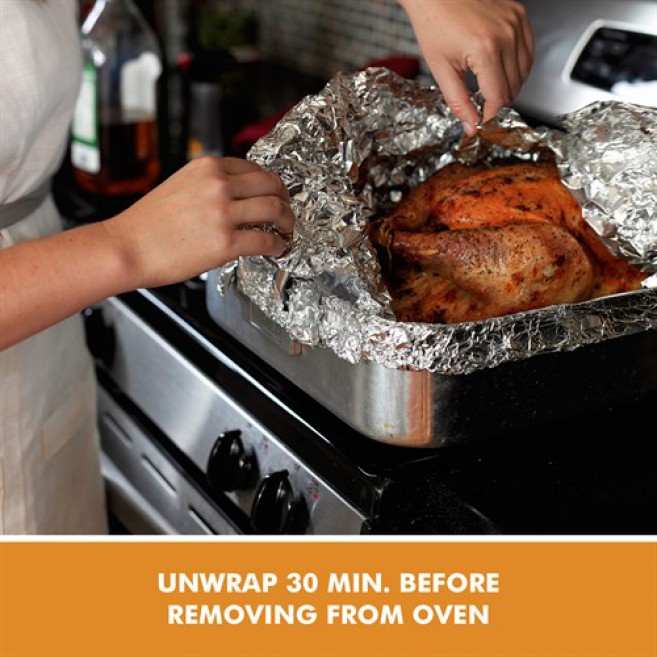
Place your turkey into the pan, arranging the wings into place. Sprinkle the top with salt and pepper. You have a couple of choices for greasing the top of the turkey (even if your turkey is self-basting). Choice #1—smear butter all over it (yum). Choice #2—lay uncooked bacon strips across the top (yum!). Either or, then pull the foil up over the bird so that you create a tent with no open spaces. Fold over the foil at the top, trying to leave a little space between the top of the bird and the foil, so that the skin doesn’t stick to the foil.
Arrange the oven racks so there’s room for the turkey, and then set the temperature to 450°. I’m serious about this. Here’s the roasting times:
- 8-12 lbs: 1½ – 2¼ hours
- 12-16 lbs: 2¼ – 2¾ hours
- 16-20 lbs: 2¾ – 3¼ hours
- 20-24 lbs: 3¼ – 3¾ hours
- 24-28 lbs: 3¾ – 5 hours
- 28-32 lbs: 5 – 5½ hours
Add half-an-hour if your turkey is stuffed. Your turkey meat should heat to 180° to be fully cooked. Your meat thermometer can be inserted behind the thigh of the turkey. If a miracle happens, the little red plastic popper thingy will actually pop out.
One-half hour before your turkey should be ready, open up the foil at the top and fold it back. Assess whether your turkey needs basting. You can spoon turkey drippings over the top, smear on more butter, or maybe the bacon was enough. Put it back into the oven until nicely browned.
Take the turkey out of the oven and allow it to sit for 15 minutes before carving.
Good Gravy

Remove the drippings from the pan with a ladle or baster. Or, have a very strong, big courageous person tip the pan and pour out the drippings.
The rule for gravy and white sauce is that flour will mix without lumps into HOT fat or COLD liquid, but not vice-versa.
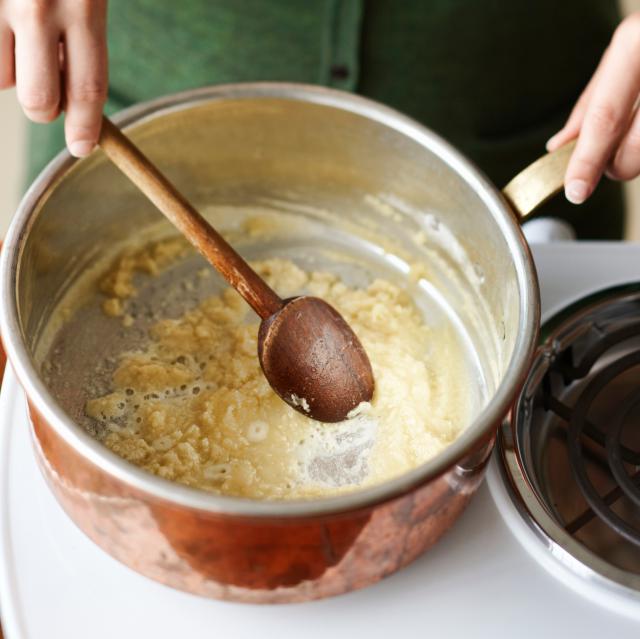
If you don’t have enough drippings for good gravy, begin with butter, and melt it in a pan. If you are using drippings, use only the oil, not the broth. Whisk in flour in an amount equal to the fat you have used. Very gradually add in the cooled turkey broth you created by boiling the giblets, or use chicken broth. Add broth until you get to the thickness you desire. Starting out with 1/4 cup fat and 1/4 cup flour will give you about 2 cups of gravy.
If I’m using corn starch, I find it better not to add it to the fat, but to stir it into cold broth and then add it. Cornstarch will thicken your gravy in about 1 minute at a near boil. Stir constantly through this process.
If you want dark gravy, the easiest way is to add a few drops of Gravy Master. However, you can make your gravy darker by being patient with your fat/flour mixture. Keep it in the pan 6-7 minutes, stirring constantly with a wooden spoon, until it browns, and then add the liquid.
Gravy should be slightly salty, since it’s a condiment, so you may need to add extra salt.
You now have the most important part of your Thanksgiving meal, the turkey, stuffing, and gravy. Enjoy! And share your best ideas below in the comments.


